|


LOVE GEMS
This tutorial
was created by Daphne using PSP X9 - February
2017
it is my own
creation and should it resemble any other
creation it would be purely coincidental.
Do not use or
place it on any website without my written
permission.
Copyright ©
2017 ~Daphne ~ All rights reserved.
*****************************
You will need
the following to complete this tutorial.
*********
MATERIALS
https://www.mediafire.com/?wpz0yiy4o1yhdi6
2543-Woman-LB
tube.pspimage
DaisyWeb_PaleHibiscus.pspimage
LovegemsHeart
pspimage
Love
GemsText.pspimage
bgd2_Lesson2.pspimage
Save
to a folder on your computer
******
Lovegems.Gold.jpg
Save
to your PSP patterns folder
******
Narah_mask
_abstract 197
Save
to your mask folder
******
Plugins
Flaming
Pear >> flexify 2
http://www.lundentreux.info/infographie/filtres/Aentree.htm
*******
In
your colour palette, set your FOREGROUND colour
to
#d2f4f9
, click ok.
************************************
STEP 1
Open
a new image 700 x 600
Transparent
background
PSPX-X9
Colour Depth= 8 bits/channel
SELECTIONS
>>>>SELECT ALL
Open
up the bgd2_Lesson2.psp
image
in your PSP workspace
Right
click on the Title bar and select COPY from the
options
Right
click on the Title Bar of your working image
and
select PASTE INTO SELECTION from the options
SELECTIONS
>>>SELECT NONE
>>>>>>
ADJUST
BLUR >>>GUASSIAN BLUR>>>RADIUS
18
>>>>>
STEP
2
Open
up the DaisyWeb_PaleHibiscus.psp
image in your workspace
Right
click on the Title bar and select COPY from the
options
Right
click on the Title bar of your working image
and
select PASTE AS NEW LAYER
IMAGE
>>>RESIZE = 90 %
Ensure
"Resize all layers" is UNCHECKED
Resample
using : WEIGHTED AVERAGE
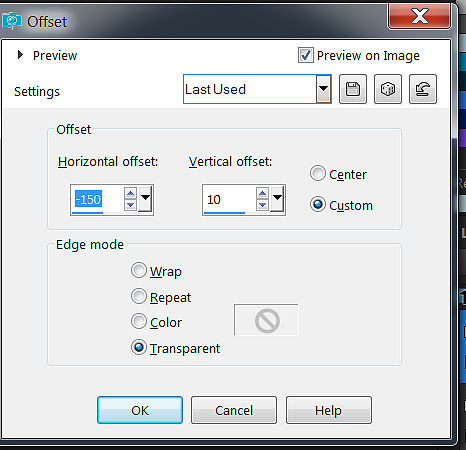
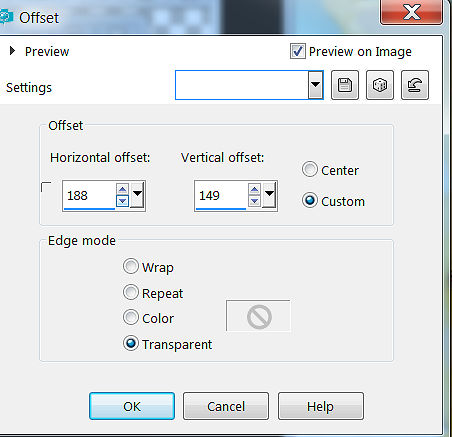
EFFECTS
>>>IMAGE EFFECTS >>> OFFSET
ADJUST SHARPEN
>>>SHARPEN
LAYERS DUPLICATE
IMAGE >>>MIRROR
>> MIRROR HORIZONTAL
LAYERS
>>>MERGE>>> MERGE DOWN
STEP 3
EFFECTS >>> PLUGINS
>>>FLAMING PEAR >>>
FLEXIFY2
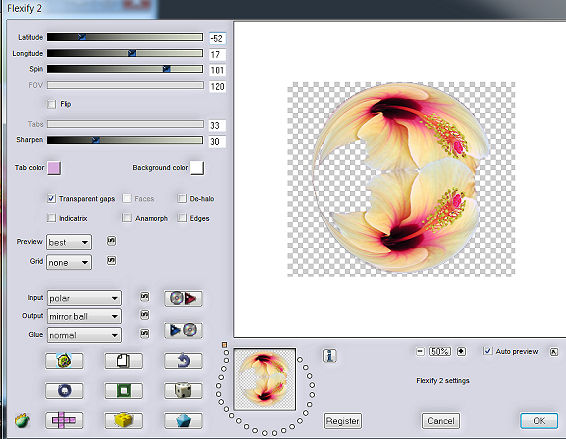
-52, 17, 101, 120 , 33 &
30
EFFECTS >>> EDGE
EFFECTS >>>ENHANCE
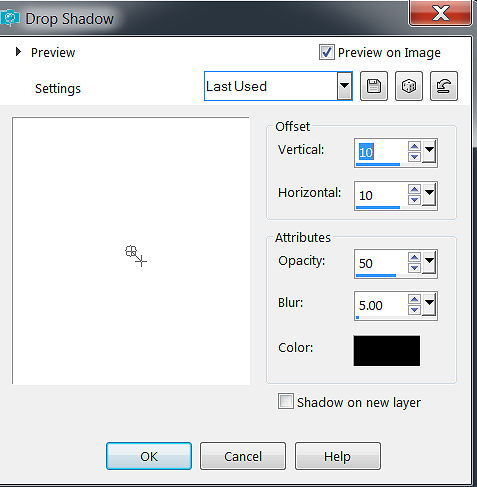
EFFECTS >>>3D EFFECTS
>>> DROP
SHADOW AT THE DEFAULT
STEP 4
Go to your
layers palette and choose "SOFT
LIGHT" from the drop down menu
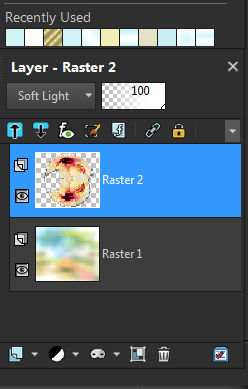
LAYERS >>>NEW RASTER
LAYER
Flood fill with blue #d2f4f9
STEP 5
LAYERS >>>LOAD SAVE
MASK>>> LOAD SAVE MASK FROM DISC
find the Narah Mask Abstract
197

EFFECTS >>>EDGE
EFFECTS >>> ENHANCE
LAYERS >>> MERGE
>>>MERGE THE GROUP
EDIT >>> REPEAT
DROP SHADOW same settings as before
************
STEP 6
OPEN UP YOUR 2543-Woman-LB
Tube.psp image in your PSP workspace
Right click on the title bar
and select COPY from the options
Right click on the title bar
of your working image and select
PASTE AS NEW LAYER from the
options
IMAGE
>>>RESIZE>>> =80%
Ensure "Resize all
layers" is UNCHECKED
Resample using WEIGHTED
AVERAGE
ADJUST
>>>SHARPNESS>>>SHARPEN
EDIT REPEAT >>>DROP SHADOW
Use your mover tool to
position the lady 2543- Woman -LB Tube to the left of your
image , as in my example
************
STEP 7
Open the Love
Gems Text pspimage in your PSP workspace
right click on the Title bar
and select COPY from the options
Right click on the Title Bar
of your working image
and select PASTE AS NEW LAYER
from the options
EFFECTS >>>IMAGE
EFFECTS >>> OFFSET
*********
STEP 8
Open the LovegensHeart
pspimage in your workspace
right click on the Title bar
and select COPY from the options
Right click on the Title Bar
of your working image
and select PASTE AS NEW LAYER
from the options
IMAGE >>>RESIZE = 30%
and reposition with your mover
tool as in the picture to under "GEMS"
ADJUST SHARPEN
>>>SHARPEN
LAYERS >>>DUPLICATE
IMAGE RESIZE = 80%
ADJUST SHARPEN
>>>SHARPEN
and again reposition with your
mover tool as in the picture
LAYERS >>>MERGE
>>>MERGE DOWN.
EDIT >>>REPEAT DROP
SHADOW
LAYERS >>>MERGE
>>>MERGE VISIBLE
***********
STEP
9
IMAGE >>>ADD BORDERS
>>>SYMMETRIC >BLACK #000000 = SIZE 3
With your MAGIC WAND
Mode = Replace
Match Mode = RGB Value
Tolerance =0
Feather =0
Antialias = unchecked
Sample Merged = UNCHECKED
PSP9-X2:
Check Contiguous
PSPX-X2:
There is no "Sample Merged "
PSPX-X2:
Use all layers = UNCHECKED
CHANGE
YOUR LAYER PALETTE TO PATTERN
Select
the border and flood fill with the LovegemsGold.jpg
SELECTIONS
>>>NONE
LAYERS
DUPLICATE
IMAGE
RESIZE =80% ALL LAYERS NOT CHECKED
ADJUST
SHARPEN >>>SHARPEN
EFFECTS
3D EFFECTS >>>DROP SHADOW

REPEAT DROP SHADOW
STEP 10
In your layer palette >>
click on the bottom layer
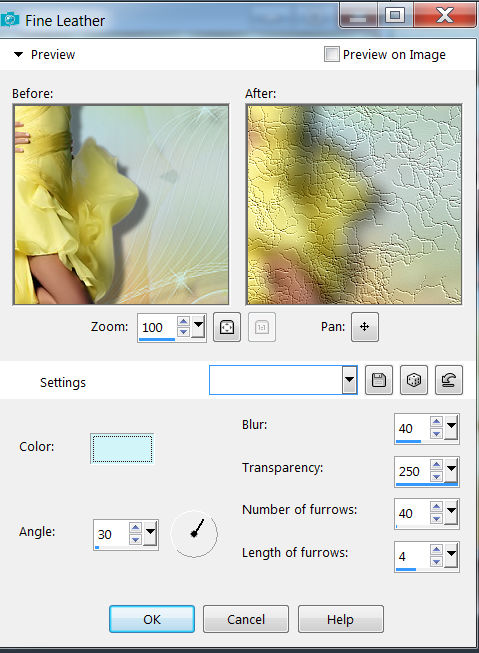
EFFECTS >>>TEXTURE
EFFECTS >>>FINE LEATHER Colour #d2f4f9
LAYERS NEW RASTER LAYER
LAYERS
>>>ARRANGE>>>BRING TO TOP
SELECT YOUR TEXT TOOL
Add your name or watermark
LAYERS>>>MERGE>>>
MERGE ALL FLATTEN.
Save as a JPG File and your
finished.
Copyright © 2017 ~Daphne ~All
rights reserved.
|